Homemade Oreos. These babies are obviously not very much like the Nabisco variety, but are so very delectable in their own way. These are definitely not new or inventive, but they are so delicious! In the event that everyone in the world doesn't already have this recipe, I'll share it here. My mom used to make these on occasion and they would disappear fast! I kind of forgot about them and rediscovered them last month. Since then, I've made for 3 different occasions! By using boxed cake mix, they come together so quickly and can be made super cute and festive by adding a little food coloring to the frosting or rolling the cookies in some fun sprinkles.
I've seen a few versions that use shortening rather than oil. I have some kind of aversion to shortening, (I'm more of a butter kind of girl!) so I love that this version uses oil and doesn't give you a totally flat cookie. Plus, the oil is much less fussy to measure.
Chocolate Sandwich Cookies {with Cream Cheese Frosting}
Printable Version
Ingredients:
2 boxes devil’s food cake mix
4 eggs
¾ cup +1 tablespoon canola oil
For the frosting:
1- 8 ounce package cream cheese, softened (Neufchâtel cheese works great too!)
½ cup butter, softened
½ teaspoon vanilla
pinch of salt
3 cups powdered sugar (use less if you don’t like it as sweet)
Food coloring (optional)
Directions:
Preheat oven to 350. In a large mixing bowl (or mixing bowl of a stand mixer) combine cake mix, eggs, and oil. Mix (using paddle attachment) until uniform and well combined. Roll dough into ping-pong sized balls and place on parchment or silicone lined baking sheets. Using the bottom of glass (or something else flat) press the cookies ever so slightly. Bake for 8-10 minutes being careful not to overbake. Allow to cool on baking sheet for a few minutes before transferring to a wire rack to cool completely.
For the frosting, beat all ingredients with an electric hand mixer until smooth and fluffy. If you wish, you can transfer the frosting into a quart-size ziploc freezer bag and snip the corner off for fast and mess-free cookie assembly.
When cookies are cooled completely, match them up by size and frost as desired. Store in refrigerator until ready to serve.
Notes:
I use the cake mix that has pudding in the mix with great results. It makes for extra-soft cookies. You can change the amount of oil in the recipe anywhere from ⅔ cup to 1 cup depending on how thick you like your cookies. Just keep in mind that you will be sandwiching 2 together, so you don’t want them too thick. Also, if you want to make giant cookies, roll the balls bigger and add a few minutes to the baking time.
Showing posts with label Frosting/Icing. Show all posts
Saturday, January 26, 2013
Friday, August 19, 2011
Chocolate Zucchini Cupcakes {with Chocolate Cream Cheese Frosting}
My husband thinks it is an abomination to put vegetables in your dessert (yet he still had no problem eating these). I, however, think it is a fabulous way to get my 5-a-day. Heck, I'd even eat 15 of these in a day. Plus, if you use 1/3 the fat cream cheese in the frosting, that means you get to eat 3x as many, right? Ok, not really, but I'm just trying to make myself feel better about the 3 that I downed today...
Chocolate Zucchini Cupcakes (or sheet cake) {With Chocolate Cream Cheese Frosting}
Printable version
*Makes 24 cupcakes, or 1 sheet cake
3 eggs
2 cups sugar
¾ cup milk
¾ cup oil
1 teaspoon vanilla
2 cups raw zucchini, grated fine
1 teaspoon baking soda
½ teaspoon baking powder
½ cup cocoa
2 cups flour (whole wheat works great)
½ teaspoon salt
Preheat oven to 350. Mix all wet ingredients. Sift dry ingredients into wet ingredients and mix well. For cupcakes, pour batter (3/4 way full) into lined muffin tins and bake for 20-25 minutes or until toothpick inserted in center comes out clean. For sheet cake, bake 40-45 minutes.
Recipe Source: Diana K.
Chocolate Cream Cheese Frosting
1 8-ounce package cream cheese, softened at room temperature
1 cup semisweet chocolate chips
½ cup whipping cream
2 cups powdered sugar
Whip cream cheese until light and fluffy. Melt chocolate chips over double boiler. Add whipping cream and stir until smooth and shiny. Add chocolate mixture to whipped cream cheese. Mix until combined. Add powdered sugar (you can use less if you want it on the less sweet side). Refrigerate to achieve desired consistency and refrain from eating all of it before your cake is frosted.
Recipe Source: Adapted from Allrecipes.com
*Makes 24 cupcakes, or 1 sheet cake
3 eggs
2 cups sugar
¾ cup milk
¾ cup oil
1 teaspoon vanilla
2 cups raw zucchini, grated fine
1 teaspoon baking soda
½ teaspoon baking powder
½ cup cocoa
2 cups flour (whole wheat works great)
½ teaspoon salt
Preheat oven to 350. Mix all wet ingredients. Sift dry ingredients into wet ingredients and mix well. For cupcakes, pour batter (3/4 way full) into lined muffin tins and bake for 20-25 minutes or until toothpick inserted in center comes out clean. For sheet cake, bake 40-45 minutes.
Recipe Source: Diana K.
Chocolate Cream Cheese Frosting
1 8-ounce package cream cheese, softened at room temperature
1 cup semisweet chocolate chips
½ cup whipping cream
2 cups powdered sugar
Whip cream cheese until light and fluffy. Melt chocolate chips over double boiler. Add whipping cream and stir until smooth and shiny. Add chocolate mixture to whipped cream cheese. Mix until combined. Add powdered sugar (you can use less if you want it on the less sweet side). Refrigerate to achieve desired consistency and refrain from eating all of it before your cake is frosted.
Recipe Source: Adapted from Allrecipes.com
Friday, July 29, 2011
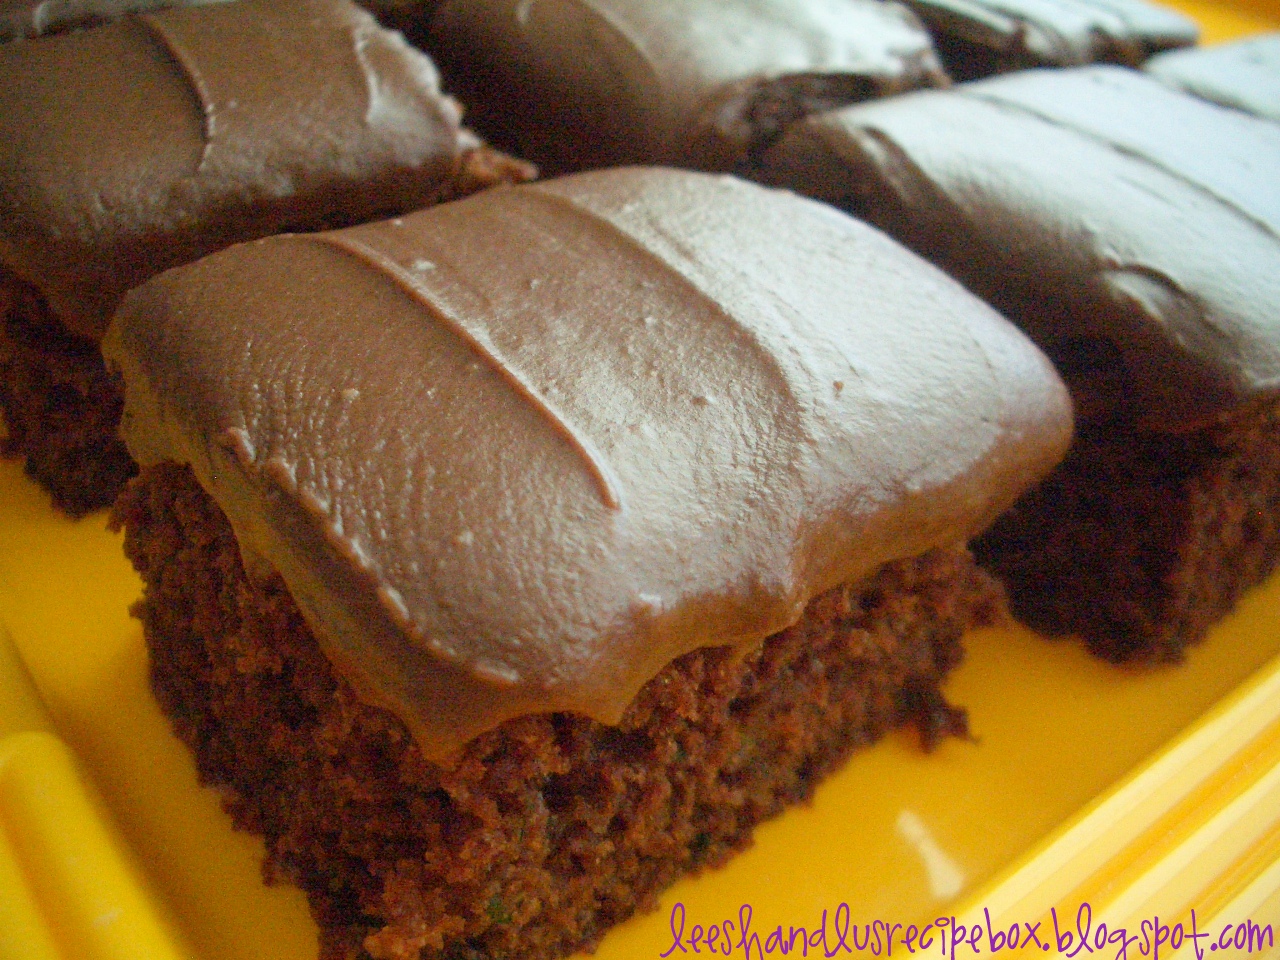
Zucchini Brownies {with Creamy Milk Chocolate Frosting}
If you are thinking: 'zucchini with chocolate....is she out of her mind?!?!?!', well, just trust me. I hope after trying any of my other recipes that you do trust me. This recipe is a classic, it's a brownie recipe my mom made for us growing up. And if you are worried about green stuff with chocolate, don't be, you won't even know there is zucchini in them. The zucchini makes them moist and luscious! And to top it off they are frosted in a creamy, milk chocolatey frosting, which makes these brownies 'out of this world'. They are dreamy, really! Mmmmmmmmmmmm.
When you try them, let me know what you think!
Zucchini Brownies {with Creamy Milk Chocolate Frosting}
Printable Version
Yield: 1 9x13 size pan of brownies Ready in: 1 hour
2 cups all-purpose or whole wheat flour (or ½ of each)
1 ½ cups sugar (can reduce a little if you are counting calories)
1 teaspoon salt
1 ½ teaspoons baking soda
¼ cup cocoa powder
1 egg
¼ cup oil
2 teaspoons vanilla
3 cups grated zucchini (coarse or fine works great, I freeze zucchini in freezer bags in 3 cup increments - if you don’t have that much, you can use applesauce until you’ve reached 3 cups)
¼ cup chopped nuts (optional....pecans or walnuts are best)
Grease a 9 x 13 size cake pan. Preheat oven to 350 degrees.
In a medium size mixing bowl combine the following: flour, sugar, salt, baking soda, and cocoa powder. In another medium size mixing bowl combine the following: egg, oil, vanilla, and zucchini. Add dry ingredients to the wet ingredient mixture along with nuts if you’d like, and mix until combined (don’t over mix, just mix til it’s all moist).
Pour brownie mixture into greased pan and smooth with rubber spatula. If you don’t spread it all the way to the edges then it doesn’t tend to climb the sides of the pan. So just spread close to the edge and it will move over as it gets hot in the oven. This makes for prettier brownies that are more evenly shaped when cut into squares. Bake in preheated 350 degree oven for 45 minutes. Test with toothpick when finished, if it comes out clean then they are done. If not, bake a few more minutes and test again. Cool completely before frosting.
Creamy Milk Chocolate Frosting
¼ cup butter, melted
⅓ cup cocoa powder
2 cups powdered sugar
¼ cup milk (more if you want it thinner - add a teaspoon at a time)
dash of salt
Melt butter in a small mixing bowl (microwave safe), add cocoa powder and stir until smooth. Add powdered sugar, milk, and salt and stir until smooth.
Frost your brownies and enjoy!
Recipe Source: Diana K.
Saturday, April 9, 2011
Glacé Icing
My nephew got baptized this afternoon and I just HAD to make these cookies. My mom made CTR shaped cookies for us kids when we got baptized and I thought it'd be fun to give them a try. Knowing I am not a very good froster, I called my mom to ask her what frosting recipe to use. She directed me this glacé icing recipe. I was really hesitant to try this because she can make everything look perfect, and I wasn't sure I could even come close. But she convinced me it was easy and slick - and it most definitely was! So I hope you'll try it too. (I made these on a harder sugar cookie, but would imagine it'd work about the same on a soft cookie.)
This icing is perfect for decorating any shape of sugar cookie. You can dip the cookie and let the icing drip off through a wire rack. Or you can pipe a thick edge that acts like a dam and then fill in the middle with the glaze in your color of choice and then pipe on words or designs. The icing dries quite hard over night and then you can stack the cookies without them leaving marks on the underneath layer. Pretty cool, huh?
Glacé Icing
From ourbestbites.com
1 lb. powdered sugar (about 3 3/4 C)
6Tbsp milk
6 Tbsp light corn syrup
1 t extract (almond, vanilla etc. keep in mind that if you use brown colored vanilla it will tint the frosting slightly)
With a whisk, combine sugar and milk until smooth and has no lumps. Stir in corn syrup and extract. This consistency is what you want for the glaze - it is nice and runny and pours our of your spoon quite fast. Pour how much you want into a separate bowl for the glaze - then you can tint it the color(s) you want.
Set aside the amount you want for the piping. For piping you want to add more powdered sugar - a few tablespoons at a time, until it's thick and pours from a spoon slowly. You can't really mess it up. If it's too thin then add more powdered sugar. If it's too thick just add more milk until it's right consistency. If you want to color your piping do so after it's as thick as you want. Put it in a frosting tube and you're ready to go.
You'll want to pipe the dam like edge after your cookies are completely cool, like the picture below. Before you add the glaze let this piping harden until you can touch it without leaving a fingerprint (about an hour).From ourbestbites.com
1 lb. powdered sugar (about 3 3/4 C)
6Tbsp milk
6 Tbsp light corn syrup
1 t extract (almond, vanilla etc. keep in mind that if you use brown colored vanilla it will tint the frosting slightly)
With a whisk, combine sugar and milk until smooth and has no lumps. Stir in corn syrup and extract. This consistency is what you want for the glaze - it is nice and runny and pours our of your spoon quite fast. Pour how much you want into a separate bowl for the glaze - then you can tint it the color(s) you want.
Set aside the amount you want for the piping. For piping you want to add more powdered sugar - a few tablespoons at a time, until it's thick and pours from a spoon slowly. You can't really mess it up. If it's too thin then add more powdered sugar. If it's too thick just add more milk until it's right consistency. If you want to color your piping do so after it's as thick as you want. Put it in a frosting tube and you're ready to go.
Then you'll fill in the center with your colored glaze (it works great with a baby spoon). Let this glaze harden too before adding words. You can add designs or words when it's wet, but they will sort of bleed and blend into each other.
Then pipe on letters or designs and let harden over night on a partially covered cookie sheet. That way the bottoms of the cookies don't dry out. In the morning the cookies should be set hard enough for stacking without denting.
Subscribe to:
Posts (Atom)