Recent Posts

Related Posts Plugin for WordPress, Blogger...
Showing posts with label Comfort Food. Show all posts

Monday, January 30, 2017

Decadent Chocolate Cupcakes with Ganache & Raspberry Buttercream


We never used to be self-proclaimed cupcake lovers. But a doctored up cake mix with some ganache and raspberry buttercream changes EVERYTHING!!!!!

Decadent chocolate cupcakes, topped with ganache and then raspberry buttercream - oh boy! These are to.die.for!

These were a fun baby-girl shower treat for one of my friends baby shower's, but they are great for Valentines Day, or any other special on non-special ;) occasion! 

We're sharing the recipe on Or So She Says ---- CLICK HERE TO GET THE PRINTABLE


Wednesday, January 11, 2017

Roasted Red Pepper & Sausage Alfredo

Need a quick and family-friendly dinner idea? Look no further than this amazing pasta dish!  Smoked sausage, shaved parmesan, and a creamy roasted red pepper sauce.  It never disappoints at our house!
Head to OSSS for the recipe printable.


Friday, December 9, 2016

Roasted Red Pepper & Tomato Soup


Cold weather is soup weather. Classic tomato soup and grilled cheese has been a favorite since I was a kid - but my taste buds have changed a lot since then, and although tomato soup is still a favorite - this roasted red pepper and tomato is a perfect combo with a more sophisticated flavor - the sweet, smoky peppers go fabulous with the tomato soup. Mmmm!  We are sharing the recipe on Or So She Says today - find the printable version there too! 

Stay warm and enjoy some soup!


Wednesday, March 23, 2016

Lemon Blueberry Cheesecake


My birthday was a few weeks ago and since I'm not a huge cake lover (except for carrot cake and a few other over the top cakes) I usually go for cheesecake or my other favorite, Strawberries & Cream Mile High Pie.  This year I changed up my favorite lemon cheesecake (the one I had the previous 2 years) to be lemon blueberry (one of my all time favorite flavor combos).  Oh man, it tasted even better than it looks.  And I loved the vibrant purple color next to the lemon, the colors were beautiful. 

My favorite thing about this cheesecake recipe is how light it is. If you've made many baked cheesecakes before you know that it's mostly made of cream cheese. This cheesecake has just as much sour cream as cream cheese, making the texture so very "melt in your mouth"....oh my goodness, it's divine. I do love classic NY cheesecake, but I'd take this version hands down any day if I had the choice between the two. 


Can we just talk a little bit about my love for blueberries?  They are so pretty and delicious! When ever I use them in a recipe I go a little crazy taking pictures of them.  This pictures just does my heart good! 

My husband needs to receive all the credit for this beautiful cheesecake, because he made it just for my birthday (love that man). I just stole a little of the filling and topping while he was mixing it up and blended in some blueberries and swirled it around.  The result was just what I had been dreaming of, it doesn't always work out that way, but when it does, it's pretty much the best!  The color and flavor of the blueberries was a perfect addition to my favorite flavor, lemon! 


This cheesecake looks so "springy" and fresh. Perfect for Easter dessert (or anytime during the spring or summer time).  I hope you'll enjoy this as much as we did.  We savored every bite!

I hope you'll enjoy the loads of pictures, I couldn't help myself. I took way more than what I've shared in this post, but it was so pretty I had to share some of my very favorites! PS. I wrote very detailed instructions for making this cheesecake, it's not hard, I just wanted to share all that I could to make sure your cheesecake turns out just as amazing! 


Lemon Blueberry Cheesecake

Yield: 1 (9 inch) cheesecake
Ingredients:


For the crust:
2 cups packed golden Oreo crumbs (or graham cracker in Notes option below)
2 tablespoons butter, melted
For the filling:
2 (8 ounce) packages cream cheese (full fat preferable), softened
3 large eggs
1 cup granulated sugar
¼ teaspoon salt
3 cups sour cream (full fat preferable)
1 teaspoon vanilla
1 teaspoon lemon extract
2 tablespoons lemon zest (zest then juice)
½ cup fresh lemon juice, strained  (about 3 lemons depending on how juicy they are)
3 ounces fresh blueberries
Topping:
¼ cup sour cream
¼ cup sweetened condensed milk
1 ½ tablespoons fresh lemon juice, strained
1-2 tablespoons blueberries
Heavy Duty Aluminum Foil/crock pot liner
Notes:


*If you’d rather do a graham cracker crust follow this: 1 ½ cups graham crackers, crushed, 3 tablespoons granulated sugar, 6 tablespoons butter, melted - combine cracker crumbs and sugar and stir until incorporated, add the melted butter and mix until the texture is uniform. Press the mixture into the bottom of a 9 inch springform pan.
*Full fat cream cheese and sour cream will result in a much better texture and flavor of cheesecake.
*There is a light blueberry flavor in this cheesecake. Blueberries have a lot of natural occurring pectin in them and adding too many I thought would ruin the texture of the cheesecake. But it makes for a gorgeous color and light blueberry flavor.
Directions:


If you want to do the golden Oreo crust, start by placing about 24 Oreos in the food processor) or in a large gallon ziplock back.  Crush the cookies in the food processor or use a rolling pin to crush them in the bag until you have crumbs.  Mix in a small bowl with the melted butter. Press into the bottom of a 9 inch springform pan  If you prefer the graham cracker crust, see notes in the NOTES section.

Preheat oven to 375 degrees F.

In a large bowl (or bowl of stand mixer) beat (with electric mixer or stand mixer) the cream cheese until smooth, scraping the bowl as needed, making sure to get all the lumps out of the cream cheese.   Add the eggs one at time, mixing each one in as you go. Add the sugar, salt, vanilla and lemon extract and mix until smooth.  Add the sour cream and mix til smooth. Add the lemon zest, lemon juice, and beat until light and fluffy and combined, scraping the sides of the bowl as needed. Scrape the sides and bottom of the bowl to make sure no cream cheese is stuck to the bottom, if it is, beat again until there are no remaining lumps.

Remove 1 cup of the filling into a liquid 2 cup measuring bowl (or blender jar) and add the 3 ounces of blueberries. Blend with a stick blender or in the blender jar until smooth.  


This cheesecake bakes in a water bath, so covering the pan in foil or with a crock pot liner  helps the cheesecake not to leak out and the water not to leak in (we don’t want a soggy crust). Most springform pans are not leak proof. Place heavy duty foil or crock pot bag around the bottom of the springform pan so that it wraps several inches up the side.  If you can, try to only use one piece of foil so that there won’t be any leaking. If you need to use two pieces make sure you fold them back several times to get a tight seal.

Pour half of the remaining lemon filling into the pan on top of the crust.  Dollop ½ of the 1 cup of blueberry filling by the  spoonful on to of the lemon filling.  Pour the remaining lemon filling on top.  Dollop with the last ½ cup of blueberry filling. Using a thin spatula or butter knife cut through the dollops making a swirly design in the cheesecake, don’t over do it. You want swirls of lemon and lemon blueberry.

Place a larger baking or roasting pan in the oven with the springform pan on it.  Use a pitcher or measuring cup to pour water into the large pan/roasting pan (so that it goes ½ way up the sides of the springform pan). Bake in the preheated oven for 35-60 minutes or until the center is firm, but jiggly (like set up jello). When it’s reached that point, turn the oven off and crack the door open a few inches and let the cheesecake cool until you can handle the pan (1-2 hours).  Remove the springform pan from the water bath and allow it to cool completely on a flat cooling rack.  Once completely cool wrap in foil or plastic wrap and refrigerate overnight (or at least 8 hours).


When you’re ready to serve, carefully remove the sides of the springform pan. And then make the topping. In a small bowl and using a wire whisk, whisk the ¼ cup sour cream, ¼ sweetened condensed milk, and 1 ½ tablespoons of lemon juice. Spread ⅔ of the mixture over the top of the cheesecake. With the remaining ⅓ of the topping - add the few tablespoons of blueberries and blend until smooth.  Place small dollops of the lemon blueberry topping around the top of and use a thin spatula to swirl them around, taking care to not swirl too much, you want there to be lemon and blueberry spots for a pretty look. 

Top the cheesecake with a handful of blueberries if desired and a lemon wedge if desired. Slice and enjoy!

Recipe Source:


Adapted from my favorite Lemon Cheesecake from Our Best Bites 


Friday, July 3, 2015

Coconut Cinnamon Popcorn


Hey friends! Today I am sharing a new favorite snack of mine. My kids, my husband and some of my extended family that I've made it for love it too.  It's a keeper. Coconut Cinnamon Popcorn! The name alone is worth drooling over.  

I was introduced to this popcorn a few months ago by one of my friends who brought it to our ladies bunco night.  Anyone else out there play bunco?  It's a simple dice game that we play and we bring random gifts from our house or whatever for prizes. It's a fun reason to get together and chat. I am way more into the chatting and snacking then the game itself, but I enjoy it all.  When I tasted the popcorn that night I had to know what was in it.  My friend, Lacey, said it was just popped popcorn drizzled with coconut oil and sprinkled with cinnamon sugar.  After hearing that there was no wonder why I loved it so much.  


Since then we've made this more times than I can count on two hands.  So I've tweaked it and perfected it just the way I like it.   And I even served it at a baby shower a week and a half ago, where I put a little banner saying, "ready to pop" above the bowl. It was a hit at the shower too. That night I drizzled it with melted white chocolate too, just to add an extra hint of yumminess, but it totally doesn't need it. 


If you are looking for a treat to share and don't want to add much sugar into the mix, this is just for you. It perfectly satisfies my sweet craving without me feeling like I have dove into something totally sinful!


Coconut Cinnamon Popcorn

[Serves 4-5  - make in 5 minutes]
Ingredients:

½ cup white popcorn kernels (unpopped)
2 tablespoons coconut oil, melted
⅛ teaspoon salt
1 tablespoon white sugar
¼ teaspoon cinnamon

Directions:

Place ½ cup popcorn kernels in an air popper (or pop them however you please). While it’s popping, melt 2 tablespoons of coconut oil in a small bowl or liquid measuring cup.

Lightly drizzle the coconut oil (in a slow stream) over the popcorn as you toss the popcorn with a butter knife or spatula.

Lightly sprinkle with salt (you don’t have to measure out ⅛ teaspoon). This popcorn isn’t mean to be salty, but a little salt with the cinnamon sugar blend makes it taste so much better.

In a small bowl mix the sugar and cinnamon until well mixed. Sprinkle the cinnamon sugar mixture over the popcorn while tossing to coat evenly.

Enjoy!

Recipe Source:

Inspired from a similar snack my friend Lacey made for me, recipe developed by Lu, originally posted on landeelu.com


If you are a cinnamon lover like me, you might also like these: Cinnamon Rolls

Or these: Caramel Apple Cinnamon Rolls


Thursday, March 5, 2015

Classic Biscuits & Gravy

Not having grown up in the south, I thought it was awfully strange that people ate biscuits for breakfast. I had only ever eaten biscuits as a dinner side. After we were married my husband convinced me that it wouldn't kill me to try it. My mother-in-law made them for us shortly after and now they make an appearance at our house a few times per year. It's one of those special occasion breakfasts for us. It shows up around Christmastime and weekends that we have visitors in town.  

I was a little embarrassed that I had to ask her for the recipe--because I guess it's not much of a recipe if you know how to make gravy (which I obviously didn't), but I was grateful she wrote it down for me anyway--it's one of the hubby's favorites. My 4-year-old and my picky almost 2-year-old loved these, too!


Biscuits & Sausage Gravy

Ingredients:


1 lb. your favorite sausage (I like Johnsonville’s HOT sausage)
¼ cup flour
2 ½ cups milk
Salt and pepper, to taste
1 can Pillsbury Grands, or 1 recipe of your favorite biscuits

Directions:


Preheat oven and bake biscuits according to recipe or package instructions.  


Form sausage into patties, if desired.  Brown patties and remove to a plate.  Brown remaining sausage.  Drain off as much grease/flavor as possible. :) Add flour and mix well.  Stir in milk.  Add salt and pepper.  (Lots of pepper!) Gravy will thicken as it boils, and as it cools.  If needed add more milk to reach desired consistency.


Recipe Source:


Leesh’s Mother-In-Law, Karen


Tuesday, October 21, 2014

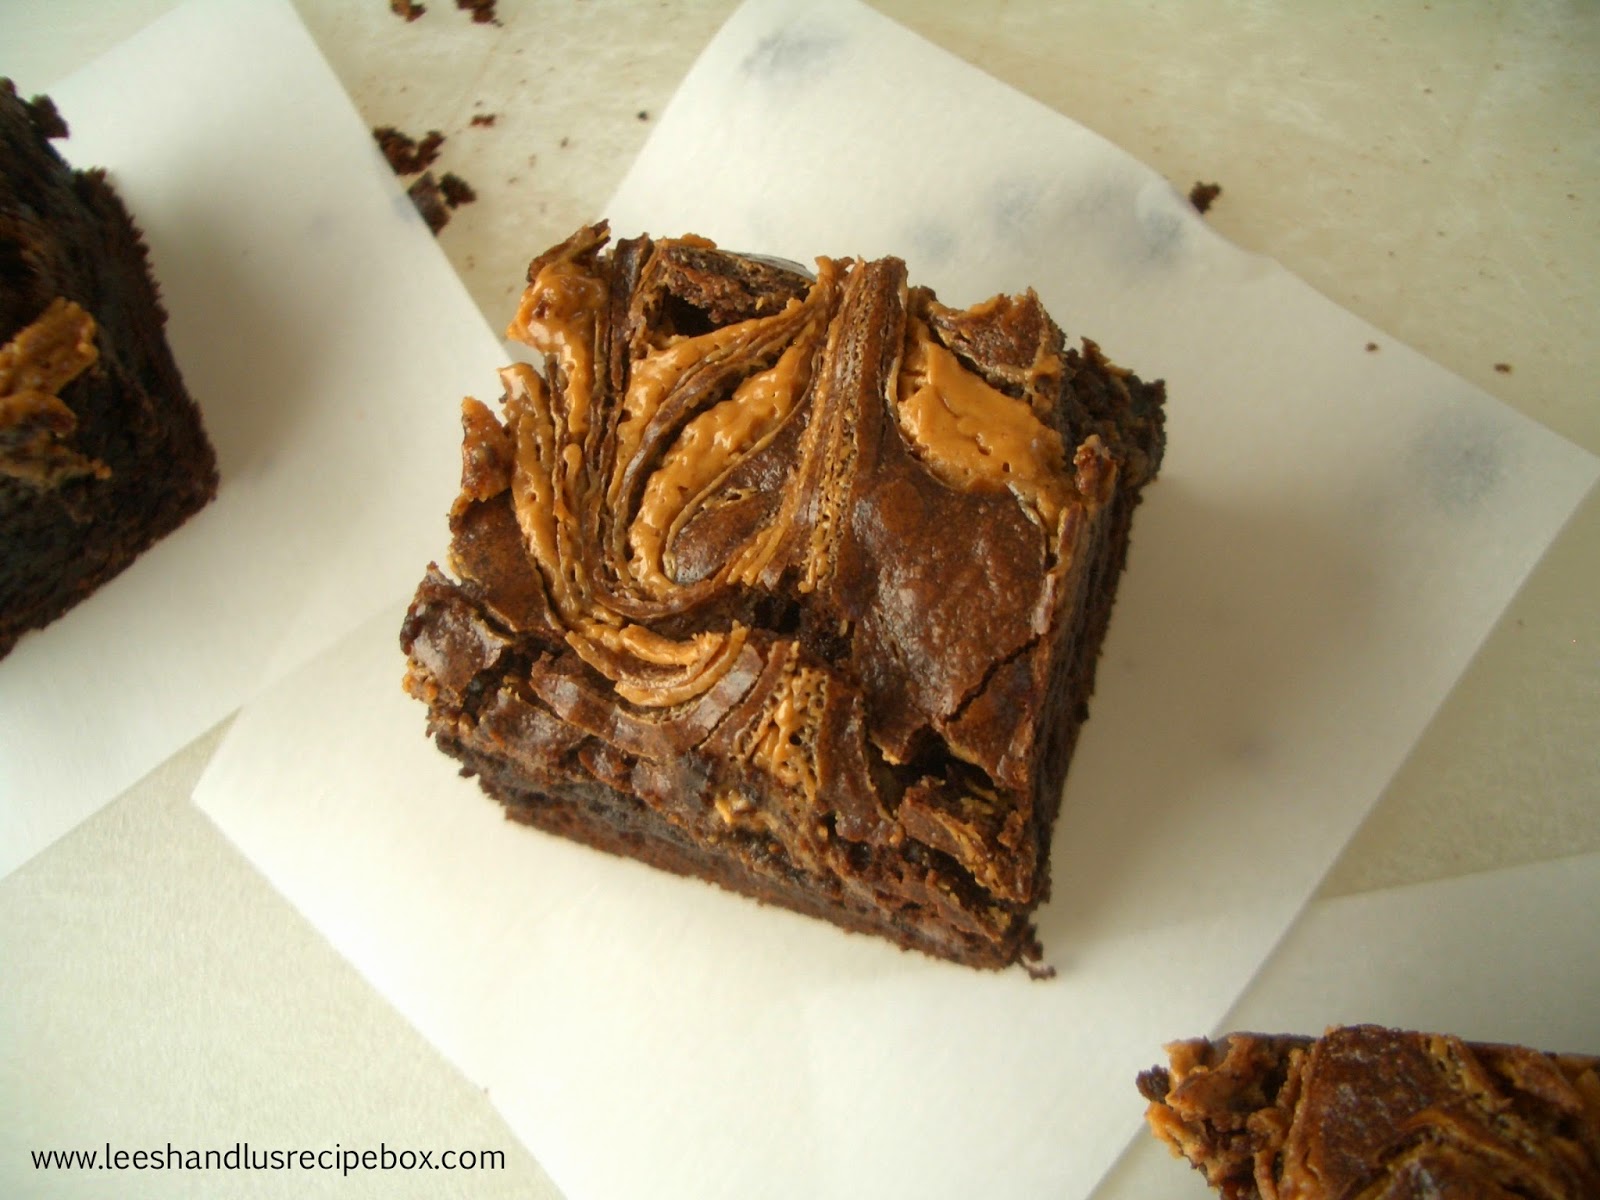
Dark Chocolate Peanut Butter Brownies


Dark Chocolate Peanut Butter Brownies | Leesh & Lu's Recipe Box

I follow this blog, and saw these brownies a few months ago.  You all know me - I couldn't think about anything else until I had a taste. As soon as I saw the recipe I decided they sounded divine, just like Melissa said, and I immediately wrote all the ingredients on my shopping list.  

A few weeks later my cousin came to visit (Hi, Christina!), and we HAD to make these.  I mean, what else do you do with your cousin/friend, etc than making yummy dark chocolate goodness?!?  

We all thought we'd died and gone to Brownie Heaven!  These are so yummy! Fudgy, dark chocolate goodness with a swirl of creamy peanut butter on the top! What is not to love?!?!  We of course had to enjoy them with a cup of cold milk to wash them down.  And we kept coming back for more.  The pan full was gone in no time!  

My husband was looking through my gallery of food pictures the other night and he said, "oh boy, those were good, we need to make them again soon!" 

These will be a favorite go-to brownie from here on out! 

Enjoy!  Please comment and let me know how you like them!  I love to hear from you!

-Lu
Dark Chocolate Peanut Butter Brownies | Leesh & Lu's Recipe Box

Dark Chocolate Peanut Butter Brownies

Printable Version {Click Here}

Ingredients:

5 ounces bittersweet chocolate chips
2 ounces unsweetened chocolate bar, chopped coarse (I used Baker’s)
3 tablespoons cocoa powder (I used Hershey’s Special Dark cocoa)
½ cup butter
1¼ cup white sugar
3 eggs
2 teaspoons vanilla
½ teaspoon salt
1 cup flour
⅓ cup creamy peanut butter

Directions:

Preheat the oven to 350 degrees F. Line an 8 or 9 inch square glass baking pan with foil, let the foil hang over the edges a few inches for easy removal. Spray grease the foil.

In a microwave safe bowl,add chocolate chips, chopped chocolate, and butter. Microwave in 30 second to 1 minute intervals, stirring often, for 1 to 3 minutes until the mixture is smooth. Add cocoa and stir until smooth. Let the mixture cool slightly.

In a large mixing bowl, whisk together the sugar, eggs, vanilla, and salt. Stir in the melted chocolate mixture until combined and smooth. Mix in the flour until it’s incorporated, don’t over mix. Using a rubber spatula, scrape the batter into the prepared pan and smooth.

Drop small dollops of peanut butter with a spoon on top of the brownie batter, trying to spread them evenly. Use a knife or thin spatula to cut through the peanut butter and pull it through the brownie layer a bit to make it swirl. Bake  for 35-40 minutes or until you insert a tooth-pick into the middle of the brownies and it comes out with just crumbs.  If it’s still doughy bake a few more minutes. You will see a bit of chocolate residue from all the melted chocolate.  

When they are done baking remove from the oven and let them cool on a wire rack until they are completely cool (if you can possibly wait). Remove the brownies from the pan using the foil that’s over hanging to lift them out. Place on a cutting board and cut into squares.  Enjoy! And try not to eat them all at once. ;)

Recipe Source:

From Melissa at Bless this Mess Please Blog - Thanks for sharing, Melissa! These are so good!

Thursday, October 16, 2014

{Our Favorite} Taco Meat

Good old tacos.  In one form or another they make an appearance at our house at least monthly.  They probably aren't really something you need a recipe for, but Linds and I both thought this idea was worth sharing.  I've been making them with the addition of beans and tomatoes for about a year now, and I won't go back.  The beans make the meat go a bit further so you can put a hearty scoop of meat on your taco without eating 1/2 of a pound of beef.  

We really like these with ground turkey and black beans, but make them with your favorite combination of meat and beans.  On busy nights, I make this in advance and throw it in the crock pot on warm until we are ready to eat.  It is perfect for taco salad and I often send any leftover filling along with some tortilla chips for the hubby's lunch.  I also put it in my kids' quesadillas to make "taco-dillas" and they gobble them right up.  It's pretty versatile and darn right delicious!

{Our Favorite} Taco Meat | Leesh & Lu's Recipe Box


{Our Favorite} Taco Meat


Ingredients:

1 pound lean ground beef or turkey
1/2 medium yellow onion, diced (optional)
1 can black beans, drained and rinsed (use your favorite kind--they are pictured here with kidney beans)
1 can diced tomatoes and their juices
Taco Seasoning--use a packet or Lu’s recipe
Salt and Pepper, to taste

Directions:

Cook meat and onion in skillet over med-high heat until meat is fully cooked.  Season with salt and pepper, to taste.  Add beans, diced tomatoes, and taco seasoning.  Cook 5 min more.  Serve immediately or keep in crockpot on WARM until ready to serve.  


{Our Favorite} Taco Meat | Leesh & Lu's Recipe Box

{Our Favorite} Taco Meat | Leesh & Lu's Recipe Box


Monday, October 6, 2014

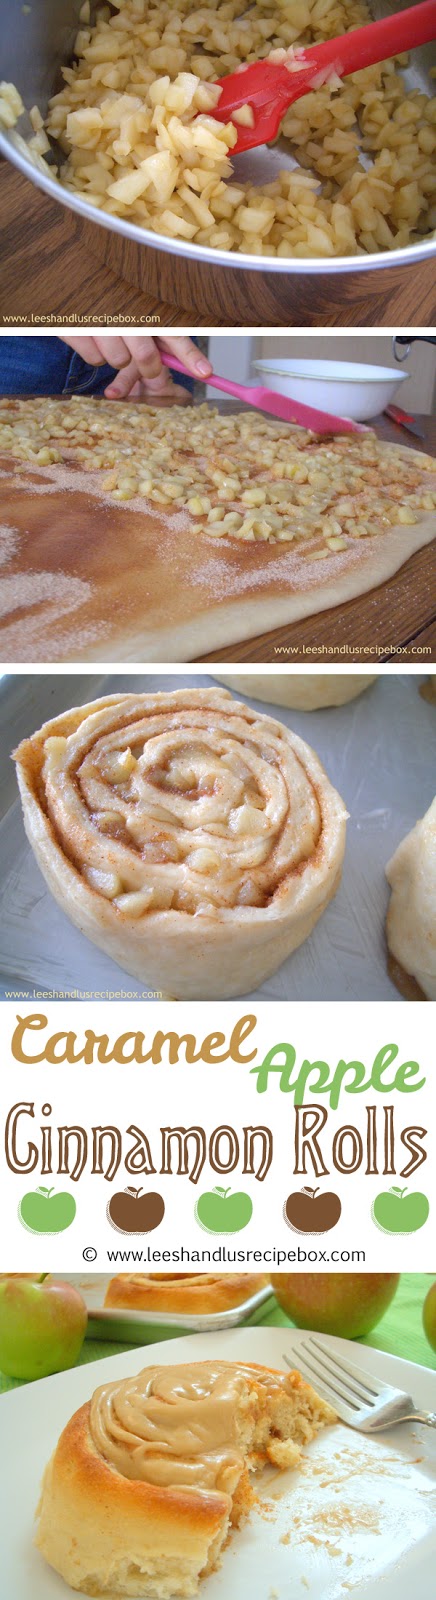
Caramel Apple Cinnamon Rolls


Caramel Apple Cinnamon Rolls | Leesh and Lu's Recipe Box


When I made Apple Butter last month it smelled amazing! I made bread a few days later and while the bread was baking I could smell the Apple Butter again.  The apple butter smell mixed with the bread smell was amazing.  It made me think of apple cinnamon bread. Yum!  That gave the the idea of making all sorts of apple breads (more recipes to come).  My first thought was Apple Cinnamon Rolls with Caramel Frosting.  

I told my husband, mom, and Leesh about it. And I really couldn't think about anything else.  When I have an idea or a food craving like this, my mind won't quit til I get a taste!  It was a good taste! These Caramel Apple Cinnamon Rolls really were like a dream come true. They tasted just how I was imagining them.  I made them two ways.  I fill half of the dough with Apple Butter, something my mom suggested. And half with cooked diced apples.  They both turned out great! I liked them both a lot, but if I had to choose I'd pick the one with the chunks of apple. I like chunks better in something like this. 

Caramel Apple Cinnamon Rolls | Leesh and Lu's Recipe Box

I used the same soft tender dough recipe that I do for my Original Cinnamon Rolls. The dough is perfect for cinnamon rolls, it's so soft and tender.  I then and added the apples/apple butter, cinnamon sugar, and topped it off with some caramel frosting.  We shared these with some of our friends, and the reviews were great from everyone.  I can't say I'll only make Caramel Apple Cinnamon Rolls, because well, I really just love a good old Original Cinnamon Roll too. But these were perfect for Fall, and gave me another way to put to use all those apples that are STILL coming from our tree out back!  Yum, yum!   

 Caramel Apple Cinnamon Rolls | Leesh and Lu's Recipe Box

I hope you enjoy! Is your mouth watering yet? Mine is!

And I'd love to hear from you. What you think of the recipe, and how you like it!  Thanks!

Caramel Apple Cinnamon Rolls | Leesh and Lu's Recipe Box

Caramel Apple Cinnamon Rolls

Apple filled cinnamon rolls with a caramel frosting

Ingredients:

Dough:
1 tablespoon yeast (I use instant yeast)
½ cup hot mashed potatoes (instant potatoes work okay or reheated leftovers)
¼ cup vegetable oil
¼ cup sugar
1 ½ tsp salt
1 ¼ cup scalded milk
1 egg
4 to 4 ¼ cups all-purpose flour

Filling: Diced Apple or Apple Butter
Melted butter (¼-½ cup I always say the more the better it tastes)

Diced apple filling:
⅔ cup sugar with as much cinnamon as you like 1-2 tablespoons
6 cups apples, finely diced
3 tablespoons butter
   
½ - ¾ cup apple butter

Frosting:
½ cup butter
¾ cup brown sugar
¼ teaspoon salt
¼ teaspoon soda
2 cups of powdered sugar
4 tablespoons milk

Directions:

In a small bowl mix potatoes, oil, sugar and scalded milk and salt.   (To scald milk you cook in a saucepan over med-high heat until it starts to bubble on the edge, not really boil, but nice and hot - when I’m lazy I just put it in a microwave safe 2-cup measuring cup and nuke it for a minute or so.) Cool the potato, oil, sugar, and milk mixture to lukewarm and put it in your mixer (or if doing by hand you’ll want it in a large mixing bowl).  Add the yeast, egg, and 2 cups of flour.  Mix until smooth. Mix in two more cups of flour. Only add more if you need it to help the dough clean the side of the mixer and until the dough is smooth and elastic.  Continue mixing/kneading for 5 minutes in mixer or by hand.

Form the dough into a ball, and place it in a lightly greased bowl. Turn the dough ball once to coat and cover the bowl with a clean towel or spray-greased plastic wrap. Leave it in a warm place and let it rise until doubled (about one hour).  

Prepare cooked apples and cinnamon sugar mixture while it rises.  For apples dice 3 cups finely and cook in a saucepan with 2 tablespoons butter stirring occasionally until apples are soft and most of the moisture has cooked out.  They will be damp, but not soggy/wet. You want them fairly dry so the dough will cook through as they bake.  Mix cinnamon and sugar in a small bowl until combined.  

You can also prepare the frosting while the dough finishes rising.  To make frosting, melt butter in a medium size saucepan, add brown sugar and boil 1 minute.  Remove from heat; and add the salt and soda; stir the mixture to combine. The soda makes it expand and rise, so make sure your pan isn’t too small.  Add powdered sugar and milk and whip with a hand mixer until smooth and fluffy.  Add more milk if you’d like the frosting more runny and add more powdered sugar to thicken it to the desired consistency.

After the dough finished rising, punch it down and roll into a rectangle shape (about the size of a large baking sheet).  It should be about ¼ inch thick.  Leaving about ½ inch uncovered on one of the long edges (so you can easily pinch the seam closed), spread with butter and then sprinkle the cinnamon sugar and cooked apples. Or use the butter and apple butter if you prefer.   Roll tightly and pinch the seam shut.  Cut into 1 ½ inch slices and place on a greased cookie sheet 11x17.  Press them down slightly and let rise until doubled again, about one hour.  

Bake at 400 degrees for 10-12 minutes or until golden brown.

Frost with Caramel Icing.

Source:

From Leesh & Lu’s Recipe Box, by Lu


Caramel Apple Cinnamon Rolls | Leesh and Lu's Recipe Box

Caramel Apple Cinnamon Rolls | Leesh and Lu's Recipe Box

Caramel Apple Cinnamon Rolls | Leesh and Lu's Recipe Box

Caramel Apple Cinnamon Rolls | Leesh and Lu's Recipe Box

Caramel Apple Cinnamon Rolls | Leesh and Lu's Recipe Box

Caramel Apple Cinnamon Rolls | Leesh and Lu's Recipe Box

Caramel Apple Cinnamon Rolls | Leesh and Lu's Recipe Box

Caramel Apple Cinnamon Rolls | Leesh and Lu's Recipe Box

Caramel Apple Cinnamon Rolls | Leesh and Lu's Recipe Box

Caramel Apple Cinnamon Rolls | Leesh and Lu's Recipe Box

Caramel Apple Cinnamon Rolls | Leesh and Lu's Recipe Box

Caramel Apple Cinnamon Rolls | Leesh and Lu's Recipe Box

Here are a few pinterest friendly images for you to save these with. 

Xo,
Lu